Summer heat hits hard, and not everyone has the yard space — or the budget — for a traditional pool. That’s exactly why the DIY stock tank pool trend has taken over backyards everywhere. It’s affordable, charming, and you can set it up in a single weekend.
But most guides online leave out the stuff that actually trips people up: how to stop rust before it starts, whether your local permits matter, how to handle a sloped yard, and what to do when the water turns green on day three.
This guide covers all of it — from picking the right tank to turning it into a backyard oasis you’ll actually want to show off.
What Is a DIY Stock Tank Pool?
A DIY Stock Tank Pool is exactly what it sounds like: a large galvanized steel trough — the kind farmers use to water livestock — repurposed as a backyard pool. Most are round, 6 to 8 feet wide, and about 2 feet deep.
They hold roughly 500 to 700 gallons of water, enough to sit and soak comfortably. And because they’re made from heavy-duty galvanized steel, they’re far more durable than inflatable or plastic above-ground pools.
The appeal? No digging. No permits in most areas. No contractor. Just a tank, a pump, and a good weekend.
What Competitors Don’t Tell You: The Things You Really Need to Know
Before jumping into the how-to, here are a few things most articles gloss over.
- Check your local laws first. Some cities and HOAs treat any body of water over a certain depth as a pool and require fencing, permits, or safety covers. A quick call to your city’s building department takes five minutes and saves you a headache later.
- Your ground matters more than you think. A full 8-foot tank weighs close to 5,000 pounds. If you set it on soft soil, it will slowly sink and tilt. Concrete, compacted gravel, or a solid paver base is non-negotiable.
- Saltwater systems will corrode your tank. Several competitor articles mention saltwater as an option. It isn’t — at least not without serious protective coating. Saltwater accelerates rust on galvanized steel. Stick to chlorine or a mineral-based system instead.
- Rust will happen eventually. This isn’t a flaw; it’s just the reality of metal. Knowing how to prevent and address it from day one will double or triple your tank’s lifespan.
What You’ll Need: Full Supply List
Here’s everything to gather before you start.
The tank:
- 6-foot galvanized stock tank (holds about 300–400 gallons) — good for 1–2 people
- 8-foot galvanized stock tank (holds about 700 gallons) — comfortable for 2–4 people
For the filter system:
- Above-ground pool pump and filter (Intex makes reliable, affordable options)
- Two 1.5-inch hole saw drill bits
- Rubber gaskets and bulkhead fittings
- Teflon tape
- Epoxy putty (for metal) or waterproof silicone sealant
For the base:
- Compacted gravel, pavers, or a concrete pad
- Carpenter’s level
For water care:
- Slow-release chlorine tablets (3-inch tabs)
- Floating chlorine dispenser
- Pool water test strips or a digital testing kit
- Algaecide (optional backup)
- Pool skimmer net
For safety and comfort:
- GFCI outdoor outlet or GFCI extension cord
- Outdoor-rated extension cord (if needed)
- Non-slip mat for the surrounding area
- Step stool or small folding ladder for entry
- Pool cover or solar cover
Step-by-Step: How to Build a DIY Stock Tank Pool
Step 1: Choose Your Location Wisely
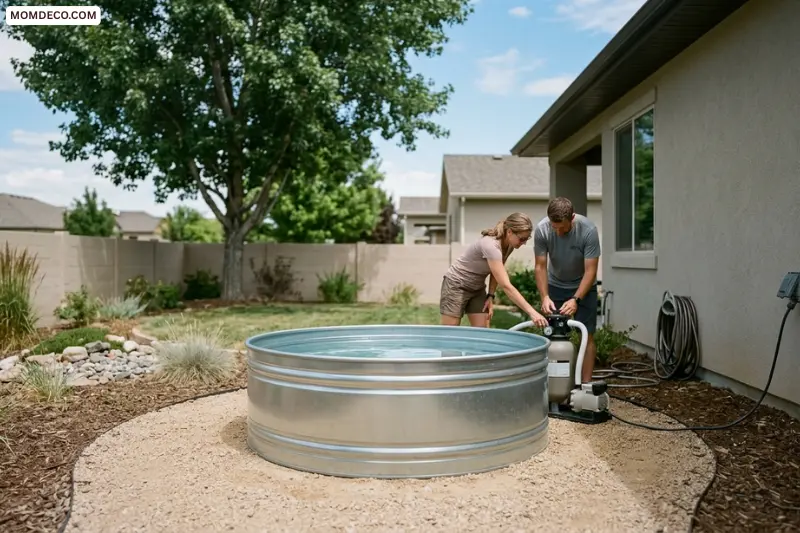
Find a flat, firm spot with at least 2 feet of clearance around the tank on all sides. Ideally, it should be within reach of an outdoor GFCI outlet and get at least a few hours of shade during the hottest part of the day — full sun all day will heat the water fast and accelerate algae growth.
Avoid placing the tank directly under trees. Falling leaves and debris will clog your filter constantly.
Step 2: Prepare the Base
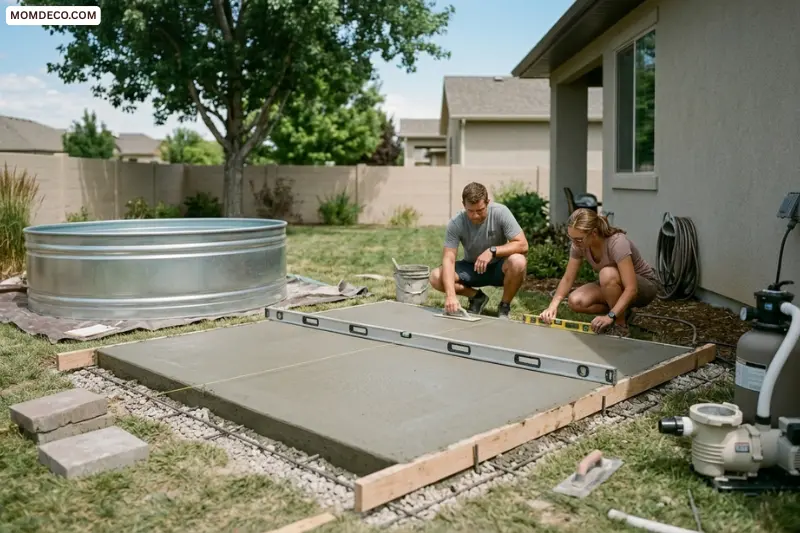
This step is where most beginners cut corners — and regret it.
Lay a 2-inch layer of compacted gravel or set concrete pavers in your chosen spot. Use a level to confirm the surface is completely flat before placing the tank. Even a small tilt creates uneven pressure on the tank walls and will cause leaks over time.
If you want a more permanent setup, pour a small concrete pad. It’s worth it.
Step 3: Test for Leaks Before You Drill
Fill the tank halfway with water and wait 30 minutes. Check all seams and the bottom. New tanks rarely leak, but it’s much easier to seal a small issue now than after you’ve drilled holes and installed a pump.
If you find a leak, drain the water, dry the area thoroughly, apply epoxy putty or JB WaterWeld, and let it cure for 24 hours before moving on.
Step 4: Install the Pump and Filter
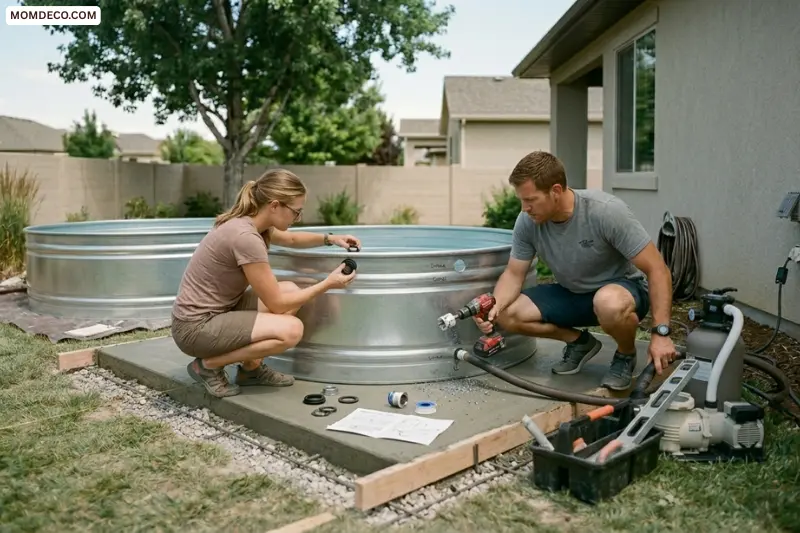
This is the most technical part, but it’s straightforward if you go slowly.
Mark two spots on the side of the tank: one near the top (for water return) and one about 4 inches from the bottom (for water intake). Use a 1.5-inch hole saw to drill both holes.
Slide a rubber gasket onto each bulkhead fitting, push them through the holes from the inside, and tighten the lock nut on the outside. Wrap all threaded connections with Teflon tape before connecting the hoses. Connect both hoses to your filter pump following the manufacturer’s diagram.
Plug your pump into a GFCI outlet only — never a standard indoor outlet. This protects against electrical shock if water contacts the cord.
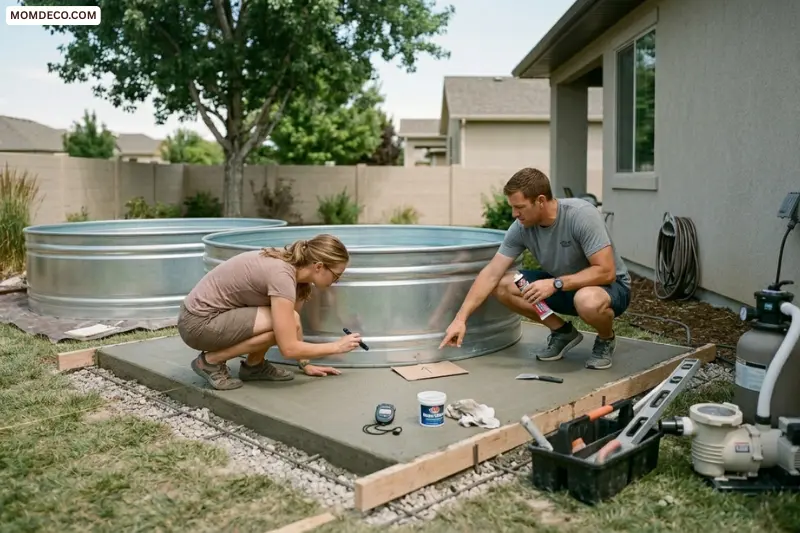
Step 5: Coat the Interior to Prevent Rust (Most Guides Skip This)
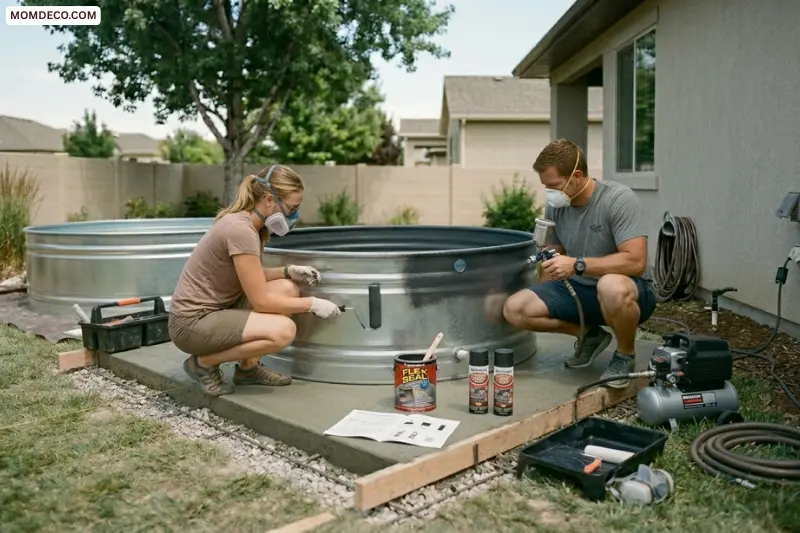
Before filling the tank completely, apply a protective coat to the inside of the tank. Options include:
- Flex Seal liquid — brush or roll it on for a seamless barrier
- Truck bed liner spray (like Rust-Oleum) — more durable, slightly rougher texture
- Epoxy pool paint — most professional-looking finish, requires more prep
Let it dry fully according to the product instructions — usually 24 to 48 hours — before filling. This single step can add years to your tank’s life and keeps the zinc coating from degrading into the water.
Step 6: Fill, Balance, and Test
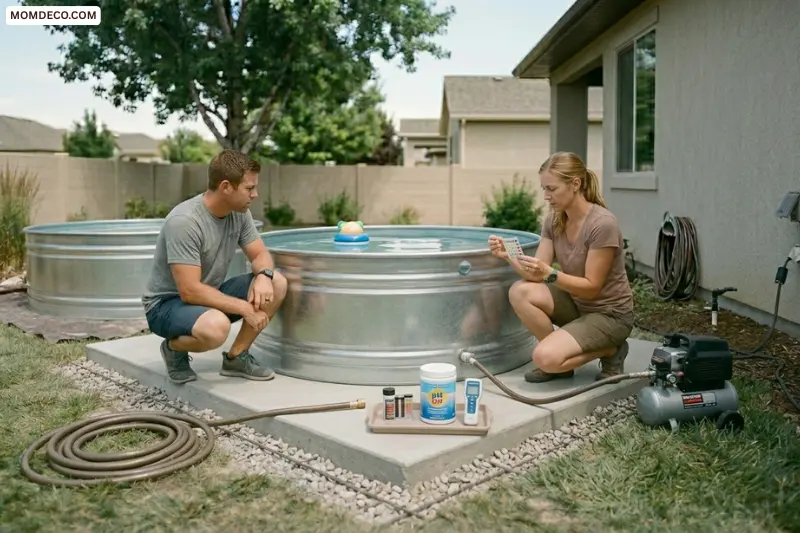
Fill the tank with a garden hose. Once full, drop in a chlorine tablet using a floating dispenser and let the pump run for at least 2 hours before testing.
Use test strips or a digital tester to check:
- pH: target 7.2 to 7.6
- Free chlorine: target 1 to 3 ppm
- Alkalinity: target 80 to 120 ppm
Adjust as needed using pH Up (sodium carbonate) or pH Down (sodium bisulfate), available at any pool supply store.
Step 7: Set Up Entry and Safety
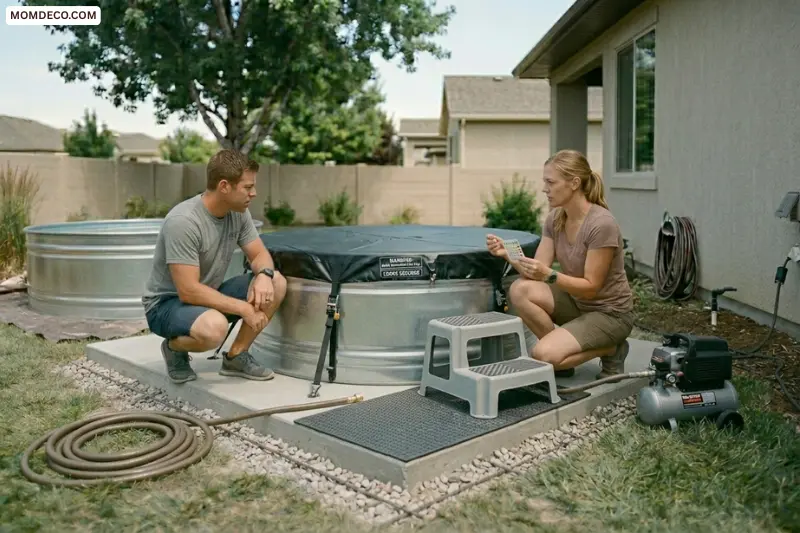
Don’t skip this step if you have kids, elderly family members, or guests who might use the pool. Set up a non-slip mat around the base of the tank. Add a sturdy step stool or a small folding platform for safe entry and exit — climbing over a metal rim can cause cuts and falls.
If children will use the pool unsupervised, invest in a locking pool cover or a safety net rated for above-ground pools.
Rust Prevention: The Long Game
Galvanized steel is rust-resistant, not rust-proof. The zinc coating breaks down over time, especially when exposed to pool chemicals.
Here’s how to stay ahead of it:
- Keep chlorine levels low and consistent. High chlorine spikes are more damaging than steady low levels.
- Use slow-release 3-inch tablets instead of liquid chlorine, which can cause concentrated exposure.
- Apply a fresh coat of interior sealant at the start of each season.
- If you see early rust spots (orange streaks, rough patches), drain the tank, sand the area with 80-grit sandpaper, apply a rust converter, and reseal before refilling.
- Never leave the tank sitting empty and wet. Dry it out or keep it filled.
Water Care Routine: Keep It Simple
You don’t need a chemistry degree to keep your DIY Stock Tank Pool clean. Stick to this weekly routine and you’ll rarely have problems.
Daily (takes 2 minutes):
- Run the pump for at least 4–6 hours
- Skim out leaves and debris with a pool net
Every 2–3 days:
- Check water with test strips
- Adjust pH or chlorine if needed
Weekly:
- Rinse or backwash the filter cartridge
- Wipe down the rim with a damp cloth
Monthly:
- Replace the filter cartridge
- Check all fittings for tightness
If the water turns green (algae bloom), don’t panic. Shock the water with pool shock granules, run the pump continuously for 24 hours, and scrub the walls with a soft brush. The water will clear within a day or two.
Sloped Yard? Here’s What to Do
This is something most articles ignore completely.
If your yard isn’t flat, you have two options. First, build a level platform — a simple wooden deck frame filled with compacted gravel works well. Second, partially excavate the hillside to create a flat pad, then build a small retaining wall on the downhill side.
Do not try to level a tank by shimming one side with bricks or wood. A 5,000-pound tank under load will crush a brick and collapse in minutes. Level the ground, not the tank.
DIY Stock Tank Pool Styling Ideas
Once your pool is functional, make it beautiful. Here are some decorating ideas that go beyond the basics.
- Wrap the outside in bamboo fencing, cedar slats, or woven rope for a natural, polished look — and to hide the utilitarian galvanized exterior.
- Paint the exterior with a bold color using epoxy paint formulated for galvanized metal. Terracotta, navy, sage green, and matte black are all popular.
- Add string lights around the perimeter or drape them overhead for evening ambiance.
- Build a small deck surround from composite decking or reclaimed wood. Even a single-step platform adds a finished, built-in look.
- Use potted plants — tropical varieties like elephant ears, cannas, or ornamental grasses create a lush, resort-style feel.
- Hang mosquito netting for a romantic canopy that also serves a practical purpose.
- Install a small outdoor shower nearby using a garden hose adapter — it encourages rinsing before entering, which keeps the water cleaner longer.
Cost Breakdown: What to Budget
| Item | Budget | Mid-Range | Premium |
|---|---|---|---|
| 8-ft galvanized stock tank | $200–$300 | $350–$450 | $500+ |
| Pump and filter | $50–$80 | $100–$150 | $200+ |
| Fittings and sealant | $20–$30 | $40–$60 | $80 |
| Base (gravel or pavers) | $0–$30 | $50–$100 | $150+ |
| Interior protective coat | $15–$25 | $30–$50 | $60+ |
| Pool cover | $20–$40 | $50–$80 | $100+ |
| Steps / platform | $0 (DIY) | $30–$60 | $100+ |
| Test kit and chemicals | $20–$30 | $40–$60 | $80+ |
| Total estimate | $325–$535 | $690–$1,010 | $1,270+ |
The biggest variable is the tank itself. Prices vary by region, so check your local farm supply store (Tractor Supply Co. is a common source) before ordering online — shipping a large metal tank adds significant cost.
Common Mistakes to Avoid
- Skipping the base prep. A tank on soft or uneven ground will tilt, leak, or sink. Always level the surface first.
- Using a saltwater system. It will corrode your tank faster than anything else.
- Plugging the pump into a non-GFCI outlet. This is a serious shock hazard. No exceptions.
- Ignoring water balance. Unbalanced water turns green in 48 hours. Test it every few days.
- Not protecting the interior. A bare galvanized interior will rust within a season or two, especially with chlorine in the water.
- Forgetting about drainage. Most tanks have a spigot at the bottom. Direct the drain away from your house’s foundation.
Frequently Asked Questions
How long does a DIY Stock Tank Pool last?
With proper rust prevention and consistent water care, a galvanized DIY Stock Tank Pool can last 10 to 15 years or longer.
Can I use a DIY Stock Tank Pool year-round?
In warm climates, yes. In cold climates, drain and dry it completely before the first freeze to prevent the steel from warping.
Do I need a permit?
It depends on your city and HOA. Most areas don’t require permits for above-ground containers under a certain depth, but some do — especially if it’s a permanent installation. Always check before you build.
Can I heat a DIY Stock Tank Pool?
Yes. Small submersible pool heaters or solar covers work well. Avoid propane heaters without proper ventilation — carbon monoxide is a real risk in enclosed outdoor spaces.
What size tank should I get?
For solo use or couples, a 6-foot tank is plenty. For families or small groups, an 8-foot tank is the better choice.
Final Thoughts
A DIY stock tank pool isn’t just a trend — it’s a genuinely smart, beautiful, and budget-friendly way to enjoy summer at home. The key is starting with the right foundation (literally), protecting your tank from day one, and staying on top of water care. Do those three things, and you’ll have a backyard feature that gets used every hot day, holds up season after season, and honestly looks better than a lot of in-ground pools costing fifty times more.
Now go find your tank. Summer isn’t waiting.